


I module: from 2 to 4m
S=Pergola width
W=Outreach
Do you have any questions? Need help?Call us +48 518 075 074

S=Pergola width
W=Outreach

S=Pergola width
W=Outreach

W = Pergola overhang
H = Height of the pergola against the wall (depends on the reach and degree of inclination of the pergola – details in the next step)
H1=Height of the support profile (standard 230cm) (possibility of making lower supports. Higher supports above 230cm are not recommended and are made optionally without warranty)
X=Height of the element above the support (standard 21cm)

S=Pergola width
S=Total width of the modules
S1, S2 = Width of individual modules
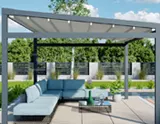
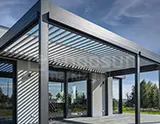
Pergola Simple (Luxo) is made to measure. When it comes to width, there are no standard sizes. The maximum width of one module is 400 cm and two modules is 700 cm. The maximum reach is 500 cm. The standard height of the front supports is 230 cm. When ordering or pricing, we always provide the total external width of the pergola.


1. Guides
2. Support profiles
3. Gutters
4. Strapping profile
5. Drive profile:
– TNA.201.01 (inner shaft)
– TNA.202.01 (outer shaft)
6. Sheet metal flashing
7. System canopy


Table with calculations for the material and pergola roof.
The height of the HP package depends on the spacing between the wind protection beams. On request, the distance between the beams can be reduced while simultaneously reducing the height of the package
Pergola luxo is attached to the wall using two extreme mounting brackets. They must be properly attached to the ground (also to the insulated wall).
Pergola Luxo connecting support profiles with the gutterPut the gutter on the M8 screws, then install the TDB.004.02 handle and screw on the M8 nuts.
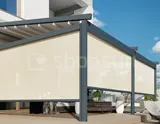
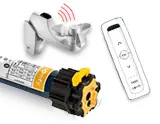
The pergola can be equipped with a manual crank mechanism (visible in the photo). In this case, the fabric is unrolled and rolled using a crank.
Optionally, the pergola can be equipped with an automatic drive.
Connect the guide with the wall bracket using an 8×70 hexagonal screw, two washers and a nut 8.
Connect the guide from the front to the handle using an 8×60 hexagonal screw, two washers and a 8 nut.
Insert the connecting profile (the direction of movement is shown by red arrows) and screw in with an M6 screw.
After installing the fastening profile, set the diagonals and verticals and then anchor the feet to the ground. The recommended diameter of the mounting pin is 10mm.
The foot can be attached to a concrete surface, paving stones or other surface.
The pergola can be combined modularly depending on your needs. The width of the pergola is basically unlimited. Modules can be connected in series. The maximum width of one module is 4m.
The pergola fabric module is factory assembled and ready to be installed on the pergola structure. The fabric module consists of windproof beams. Strips of fabric are attached to each beam. The entire model must be attached to the guide carriages (which are factory-installed in the pergola guides).
*To facilitate the installation of the fabric module, it is best to use scaffolding or ladders to support the fabric as close to the guide carriages as possible.
Install the profile, the bag and its clip of the TNS.012 bag profile with a self-drilling screw of a size selected for the thickness of the type of substrate.
Start the motor and then move the first cart down the guide, positioning it close to the gutter.
Place the fabric bundle on the scaffolding close to the guides.
Installation should start by attaching the front beam.
Then install all the small beams in the same way.
The final stage is the assembly of the so-called “bag” of fabric. It should be attached to the wall using a strip.
The pergola is standardly equipped with a hand-crank drive. In this case, the fabric is rolled and unrolled using a crank. We can place and stop the fabric anywhere. The crank is detachable and can be removed in one move if necessary. When ordering, we specify the side of the crank.
For an additional fee, the pergola can be equipped with an electric drive. It is mounted on the main winding tube. For the electric drive, we can use a traditional key switch or a wireless remote control. If necessary, weather sensors can be installed.
Expansion screw with dimensions adapted to the thickness and type of the substrate.
Sheet metal screw with hexagonal head 5.5×22.
Insert the under-roof profile (the direction of movement is shown by red arrows) and fasten with an M6 screw.
Expansion screw with dimensions adapted to the thickness and type of the substrate.
Sheet metal flashing.
System roof: Trapezoidal sheet TRB-12/1064
Attic profile
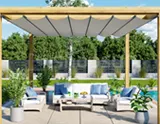
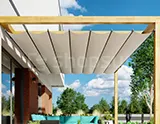
The fabric is completely taut when fully unrolled. Rainwater flows to the front of the pergola (to its gutter). The water is then drained through the front support. (right or left to be determined when ordering).
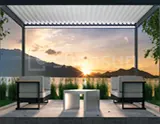
The pergola can be optionally equipped with LED lighting. It comes in two variants.
The first variant is spot lighting. Special LED eyes are located in the roof profiles. Their number depends on the size of the pergola and is selected individually. We control the lighting using a remote control. In addition to the on/off functions, we can also freely control the light intensity.
The second variant (definitely cheaper) is LED strip lighting. This is a special LED strip that is integrated in the front gutter of the pergola. Similarly to point 1, the lighting is controlled using a remote control.
Pergola Luxo – Measurement and Technical Data – how to measure – pergola Luxo, slim, how to measure, technical data, pergolas, pergola luxo technical data, wall pergola side view, white pergola luxo construction details, custom-made terrace pergola, Pergola wall assembly, luxo terrace pergola, wall pergolas pricing, Pergola Luxo, pergola components, Guides, Support profiles, Gutters, Connecting profile, Drive profile, Sheet metal flashing, System canopy, Pergola simple connection support profiles with a gutter, Pergola luxo technical sketch, pergola construction, Pergola luxo installation of wall brackets, Pergola luxo against the wall, measurement of a terrace pergola, pergola modules for a terrace


