Do you have any questions? Need help?Call us +48 518 075 074

Global Lamel Pergola – Measurement and installation

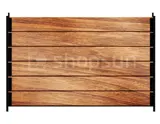
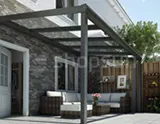
S – total width of the pergola
W – pergola overhang


300 x 300 x 280 cm
Actual roof dimensions: 290 x 290
(pergola weight: 121 kg)

400 x 300 x 280 cm
Actual roof dimensions: 290 x 390
(pergola weight: 149 kg)

400 x 400 x 280 cm
Actual roof dimensions: 389 x 389
(pergola weight: 179 kg)

580 x 300 x 280 cm
Actual roof dimensions: 572 x 290

580 x 400 x 280 cm
Actual roof dimensions: 572 x 389


H – total height of the pergola
H1 – height after subtracting the pergola roof
The standard height of the pergola is H = 280 cm. We can lower the pergola to any height for an additional fee.

Lamellas cannot be retracted.
Aluminum beam 120 x 100 x 2.0 mm.
Aluminum poles 100 x 100 x 1.6 mm.
Aluminum slats 145 x 23 x 1.14 mm.
Column height 2800 mm.


H – total height of the pergola
H1 – height after subtracting the pergola roof
The standard height of the pergola is H = 280 cm. We can lower the pergola to any height for an additional fee.


Method of draining water from the pergola
The pergola is fully waterproof. It is standardly equipped with a water drainage system. It flows through a system of gutters to the front supports.


Color of Pergola Structure
In this model, we can choose only one color of the structure, i.e. graphite black (RAL 9011). The color of the structure consists of, among others: all load-bearing elements of the pergola.


Video of Pergola Assembly:


Lamel Pergola – Freestanding – Example of Pergola Assembly 3m

Pergola components:

Column I
Column II
Beam (left)
Beam (right)
Front and rear beams
Middle beam
Lamela
Bottom plate of the column
Column cover
Connectors for middle beams
Gear eye
Crank
Conical Allen head screw
Flat pad
Bolt + nut
Pin
expansion
Silicon


1. Install the bottom plate F on the column A1 / A2, and tighten the screw K1. Attach the screws to all 4 columns as shown.


2. Fit the H6 connector on one side of the middle beam D, and then tighten the screw K; then do the same on the other side of beam D.


3. Fasten the gear eye of the gear drive to the B1 beam using the K4 screw and nut. Do the same on beam B2.4. Fix the columns and beams as shown in the drawing and pay special attention to ensure that the column drains face the same direction.


4. Fix the columns and beams as shown in the drawing and pay special attention to ensure that the column drains face the same direction.


5. Place the C beam (front/rear) appropriately on the corner connectors in the columns and fasten it with K1 screws.


6. Place both beams B1/B2 (left/right) at the corner connectors in the column as shown and fasten them with K1 screws.


7. Place the last beam C (front/rear) in the corner connectors in the columns and fasten with K1 screws.


8. Attach all 4 column covers as shown to the column and beam corner connectors. Use K2 screws to assemble.


9. Attach the center beam to the attached columns


10. Fasten the columns to the ground using L expansion bolts or another previously prepared method


11. Seal all column-to-beam joints with silicone. Also run silicone around the drain opening.


12. Place the E slat on the back of the slat holder on both sides of the beams and then press it until the slat clicks into the mounting latch. Attach the remaining slats in the same way.


13. Attach the hand crank J and turn it to check whether the slats close and open properly. Check whether the entire structure has been properly assembled and whether all screws are tightened.


Lamel Pergola – Freestanding – Example of Pergola Assembly 5.8m

Pergola components:

Column
Middle column
Beam (left)
Beam (right)
Front and rear beams I
Front and rear beams II
Central beam with drive
Middle beam
Lamela
Bottom plate of the column
Column cover
Connectors for middle beams
Gear eye
Crank

Conical Allen head screw
Shelf screw with Allen key
Flat washer
Bolt + nut
Flat washer
Expansion plug
Silicon
Plastic cap
Center beam cover
Drainage connector (optional)
Lower plate of the center column
Corner support (optional)
Screw (optional)


Optional:
1. Attach the P drainage joint to the column groove
2. Attach the bottom plate F to the column A1/A3 with screws K1


3. Fix the bottom plate F and Q to the columns A1, A3 with screws K1


4. Attach the connector to the D1/D2 center beam with K1 screws
5. Insert the gear eye into the drive shaft and secure it with the K4 nut and bolt
6. Place the column as shown in the lower figure


7. Insert the B1 beam into the A1 column and fasten it with K1 screws


8. Insert the C1 beam into the columns A1, A3 and fasten it with K1 screws
9. Fasten the columns to the beams with K1 screws as in the lower drawing


10 . Attach the cover G to the columns and beams with screws 2 as in the upper drawing
11. Attach the cover O to the columns and beams with screws K1 and K2 as in the lower drawing


12 . Adjust the position of the columns to keep them perpendicular to the ground. The width of the top of the columns should be measured according to the width of the bottom of each of the two columns. Then mark 24 holes in the ground, which should correspond to the holes in the bottom plate


13 . Use a drill to drill 24 holes in the ground, dimensions 10×80

Drilling depth: ∅10×80, Number of drillings: 24

14. Fix the columns to the ground using L expansion plugs and K5 washers


15 Seal all column-beam joints with silicone M. Run silicone around the drain opening as well
16 . Place the D1/D2 center beams on the front and rear C1/C2 beams


17. Place the E slat on the back of the slat holder on both sides of the beams and then press it until the slat clicks into the mounting latch. Attach the remaining slats in the same way.

Install the first two slats between the beams


18. Align and fasten the hole under the D 1/D2 beams with K2 screws and K3 washers. Then align and attach the holes in C1/C2

Install the remaining blinds one by one


If the holes are not aligned as shown, you will need to adjust them:
Insert a straight screwdriver in position 1 and move the louver bracket in direction 2 to make the holes concentric
After adjustment, the holes are concentric


19. Insert the plastic plugs N into the holes at the ends of the slats


20. Attach the hand crank J and turn it to check that the slats open and close properly. Check whether the entire structure has been properly assembled and whether the screws are tightened.


Installation corner support (optional):
Align corner support R with the bottom edge of beam B1, fix with screws S, install the remaining corner supports one by one


Lamel pergola - Free-standing - Measurement and assembly - Laminated pergola Dimensioning, pergola measurement, terrace pergolas dimensions, Lamella pergola pergola components, pergola assembly instructions, Lamella pergola assembly, installation of the pergola bottom plate , Slatted pergola assembly, pergola beam connectors, Slatted pergola assembly of the pergola drive gear, Slatted pergola assembly, installation of pergola columns, connecting beams and columns, Slatted pergola assembly instructions, installation of the rear pergola beam, Slatted pergola assembly of pergola beams, Slatted pergola installation of corner connectors pergola, slatted pergola assembly, terrace pergola assembly instructions, slatted pergola assembly, aluminum pergola assembly instructions, slatted pergola assembly, free-standing pergola assembly instructions, slatted pergola assembly, sealing pergola joints, slatted pergola assembly, installation of pergola slats, slats installation instructions, pergola slatted assembly, installation of pergola slats, manual control assembly instructions, pergola crank assembly, Slatted pergola bottom column plate, pdf assembly instructions

qqq
Zapisz do PDF

Trwa generowanie dokumentu, poczekaj chwilę

Back Zapisz do PDF
Your cart email sent successfully :)