Do you have any questions? Need help?Call us +48 518 075 074

Measuring the Corsica Selt awning

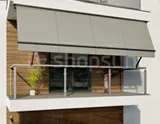
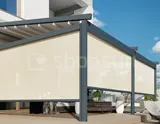
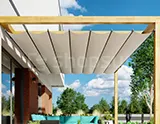
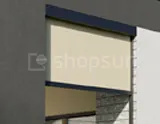
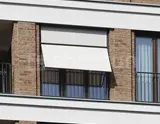
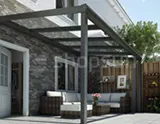
Measuring the Corsica Selt awning – The awning has two main dimensions on the basis of which the valuation is made. The first is the total width of the awning, and the second is the awning’s extension (extension). The required dimensions are given in cm, the production standard provides for the tolerance of the width dimensions – + 2 cm. Depending on the width of the entire structure, the manufacturer provides a different number of mounting brackets. The height of the structure depends on the selected model and does not affect the price. The instruction for measuring the patio awning is presented in the picture on the right.

AVAILABLE DIMENSIONS:
Width: from 210 to 700 cm
Projection: from 160 to 360 cm

Evaluate the Marquise – Click Here


Patio awning Corsica Selt – specifications

Overhangs available 1.6m; 2.1m; 2.6m; 3.1m; 3.6m;
Maximum projection 3.6m
Arms folding, made of aluminum, with springs and a Flyer chain
Tilt angle from 5 to 35 degrees
Mounting brackets to the wall, ceiling, rafters
Winding tube diameter 70mm
Half-cassette as standard Yes
The color of the structure white ral9010, beige ral1015, silver ral9006, bronze ral7021, silvery graphite or any other color from the ral palette at an additional charge
Fabric over 100 colors, Teflon-coated acrylic fabric
Frill no valance on this model
Manual drive none
Automatic drive electric motor without emergency opening
Automation key switch, control unit, remote control, wind sensor
We recommend a motor with electronic limit switches

The electric drive with electronic adjustment of end positions (upper and lower positions) allows you to program the cover so that it unfolds to the indicated place, and not over the entire awning’s projection. The so-called The “comfort position” can be called up manually or automatically.


Corsica Selt – Methods of installation

1. Mounting the awning to the wall
2. Mounting the awning to the ceiling
3. Mounting the awning to the rafters


Corsica awning – Types of handles

1. Wall brackets
2. Ceiling holders (combined with wall holders)
3. Rafter holders (combined with wall holders)

See ways to assemble the awning
Awning Assembly Instructions – Watch the Video


The number of mounting brackets (from 2 to 5) depends on the width of the awning.

The number of mounting brackets (from 2 to 5) depends on the width of the awning. Characteristics of the Corsica Selt awning manufacturer sets a standard number of handles for given dimensions, if there is such a need, it is possible to use more handles. The assembly of the awning is basically very simple and is limited to attaching the handles to the wall or ceiling, for example. The awning is now completely twisted and adjusted. If necessary, we can also freely set the tilt angle. We can also attach it without any problem to a wall insulated with e.g. polystyrene, up to a thickness of 20 cm.


Tight awning cassette

The cassette of the system is based on a square supporting beam, which, with large dimensions, ensures the stability of the entire structure, and at the same time greatly facilitates its assembly. The construction of the awning provides the possibility of installing LED lighting, which allows the user to freely enjoy the charms of summer evenings. The led strip is placed along the awning’s cassette and can be controlled by the same automation as unfolding and retracting the awning, or with a separate remote control.

See the Marquee Leds Gallery – Click Here


Characteristics of the Corsica Selt patio awning

– Tilt angle adjustable from 5 ° -35 °
– The awning has an adjustable tilt angle that can be adapted to your needs
– It is possible to mount the awning to the wall, ceiling, roof rafters
– Tight awning cassette make this awning really durable for weather conditions


CORSICA SELT awning angle adjustment

The Corsica awning has an adjustable tilt angle of 5 ° -35 °. Below is a step-by-step instruction on how to properly adjust the awning.
To change the angle of the awning, do the following:
– Extend the awning completely.
– Loosen the adjusting screw with the Allen key.
– Using a spanner, unscrew (increasing the angle of inclination) or tightening (decreasing the angle of inclination) the adjustment screws of the arm handles one by one.
– Tighten the adjusting screw with an Allen key.

Use a spirit level to check that the front beam is horizontal.

In case of difficulties, please ask our dealer.


Corsica awning components

1 – Cassette
2 – Wall bracket
3 – Side cover
4 – Shoulder
5 – Front beam cap
6 – Awning fabric
7 – Front beam
8 – Option ceiling bracket (combined with wall bracket)
9 – Option rafter bracket (combined with a wall bracket)


Zapisz do PDF

Trwa generowanie dokumentu, poczekaj chwilę

Back Zapisz do PDF
Your cart email sent successfully :)